Proxmox Backup Server Configuration
Proxmox Backup Server is a powerful and flexible solution for managing and protecting your data. This detailed guide will walk you through the initial server setup step by step.
If you haven't yet set up your physical machine or dedicated virtual machine, follow the steps in our Proxmox Backup Server Installation Guide first.
Initial Setup
After installation, access the Proxmox Backup Server web console using a web browser and entering the server’s IP address. The default port is 8007 (HTTPS), so the full address will be https://IP-ADDRESS:8007. Log in with the administrator credentials root created during installation.
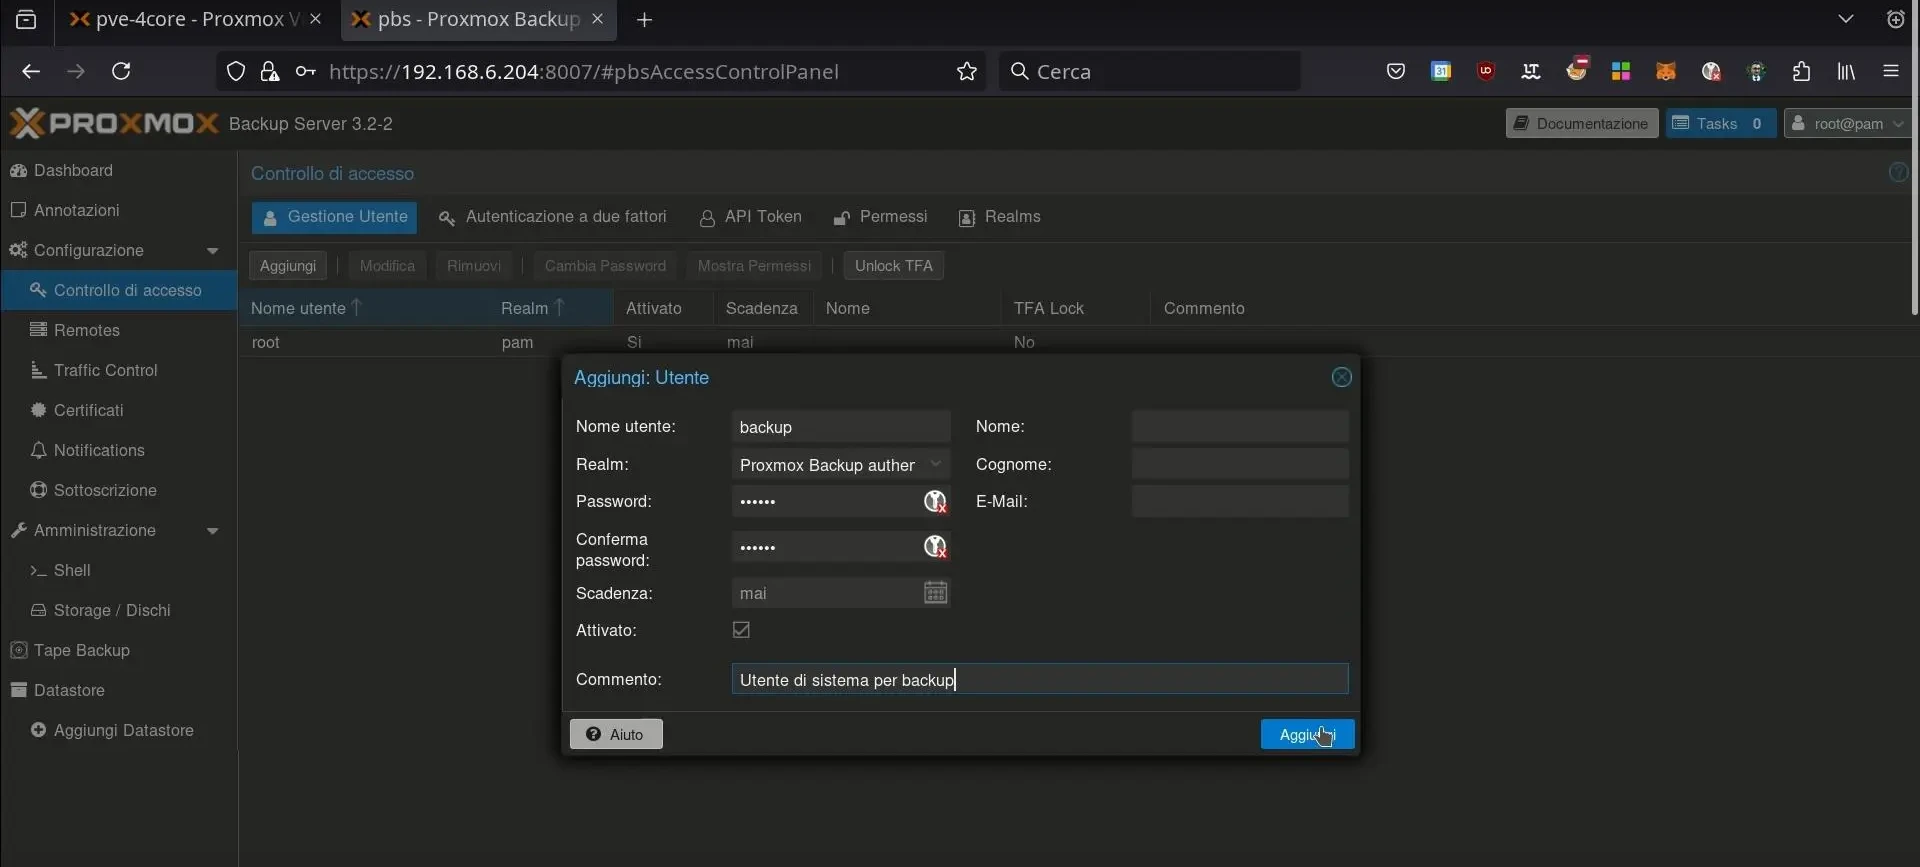
Creating a User for Backups
First, create the system user you’ll use for backups by navigating to “Configuration / Access Control / User Management / Add.”
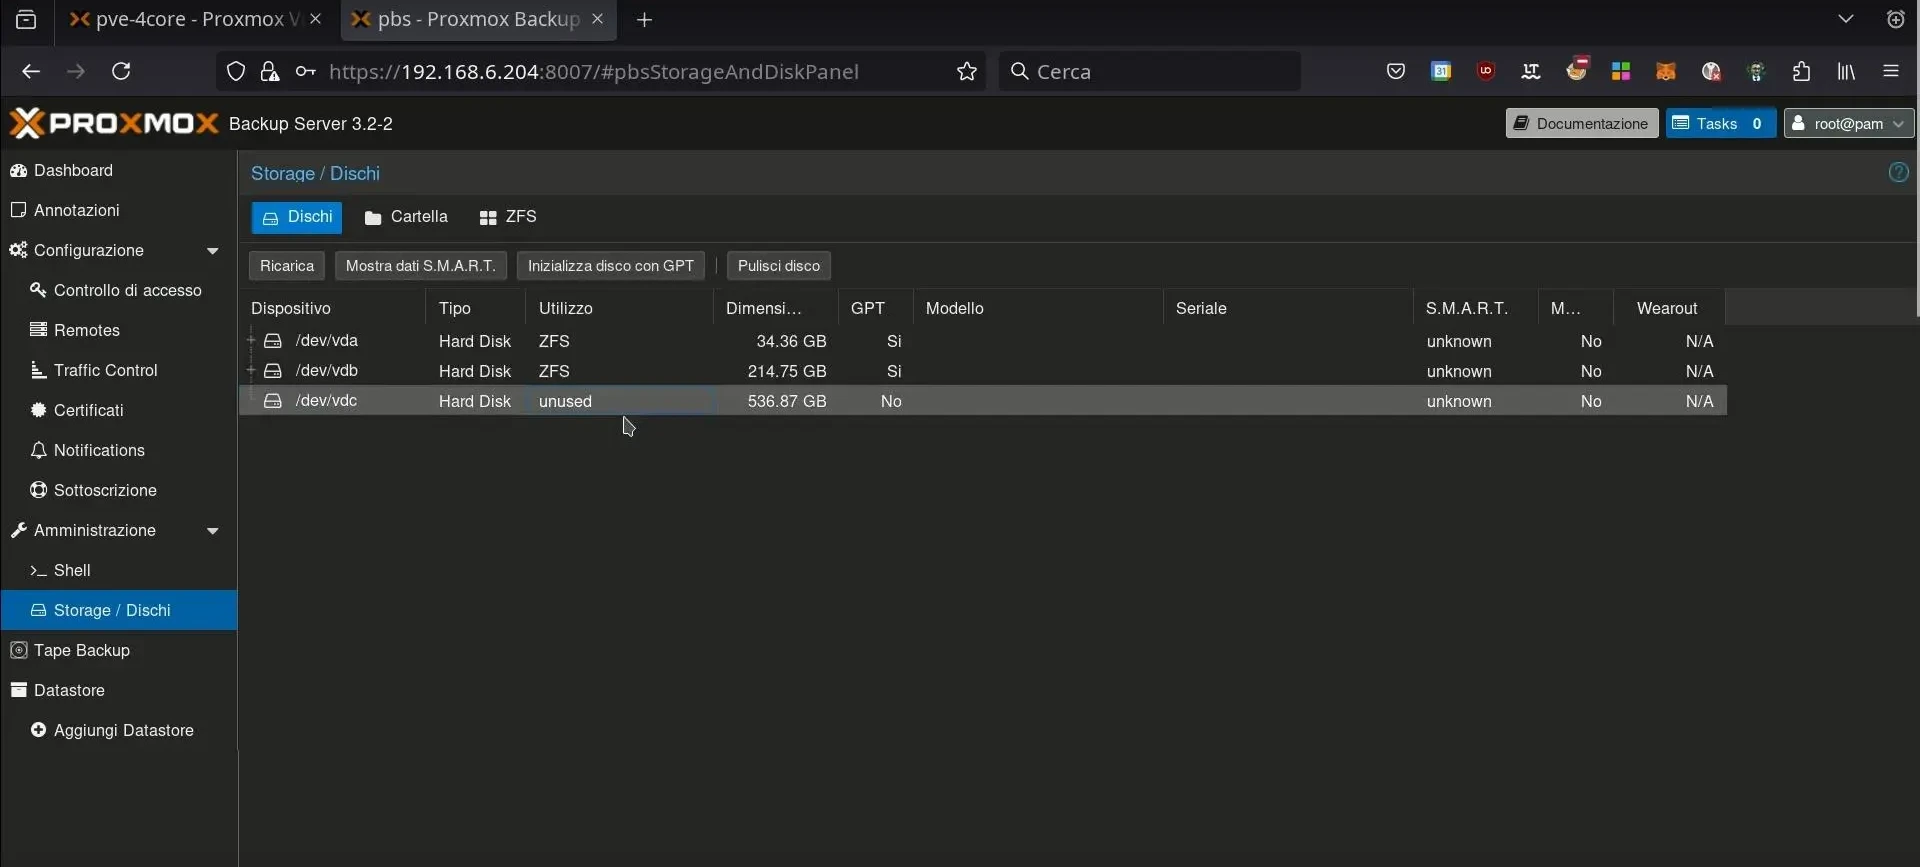
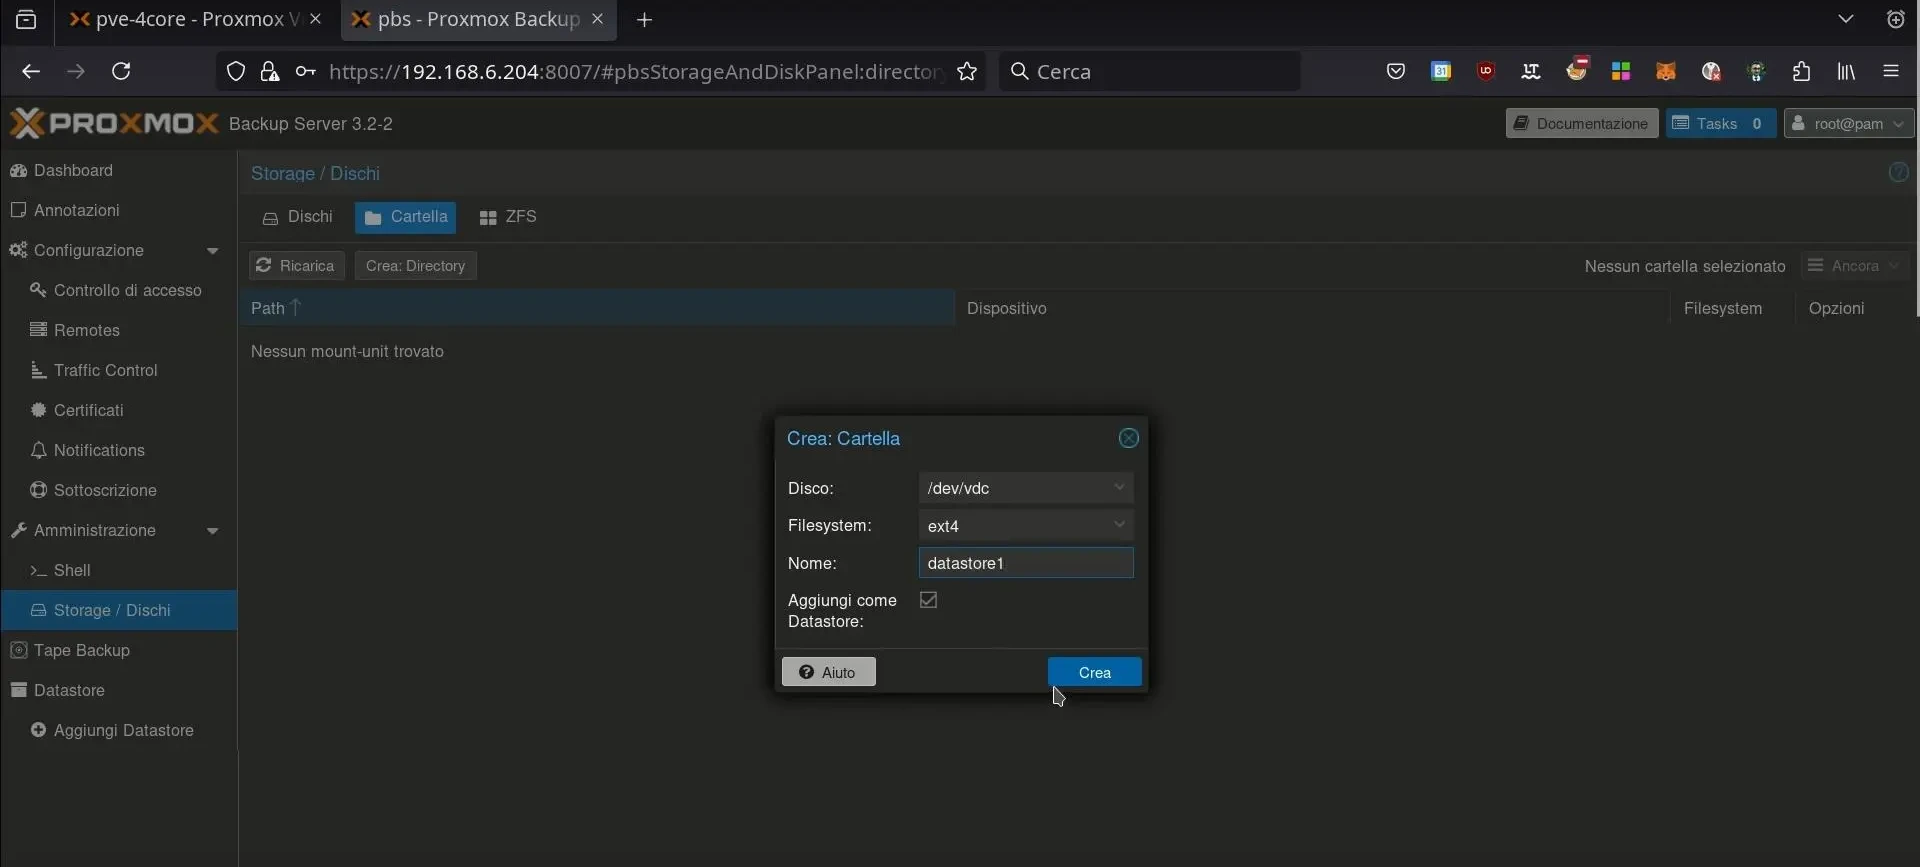
Select the secondary disk, which we’ll use for backups, under “Administration / Disk Storage.” If the disk is empty and unformatted, it will be listed as “unused".
Go to the “Folder” tab and create a “Directory.” Select the mount point and the file system; we strongly recommend ZFS to take full advantage of its native protection against data corruption; see our Linux filesystem comparison for details: btrfs vs zfs vs ext4. Enter a descriptive name for the datastore and save your changes.
Assigning Permissions
Once our disk is formatted, we’ll see a new datastore listed under “Datastore / datastore1.” By clicking on it, we can assign permissions to the user we created earlier
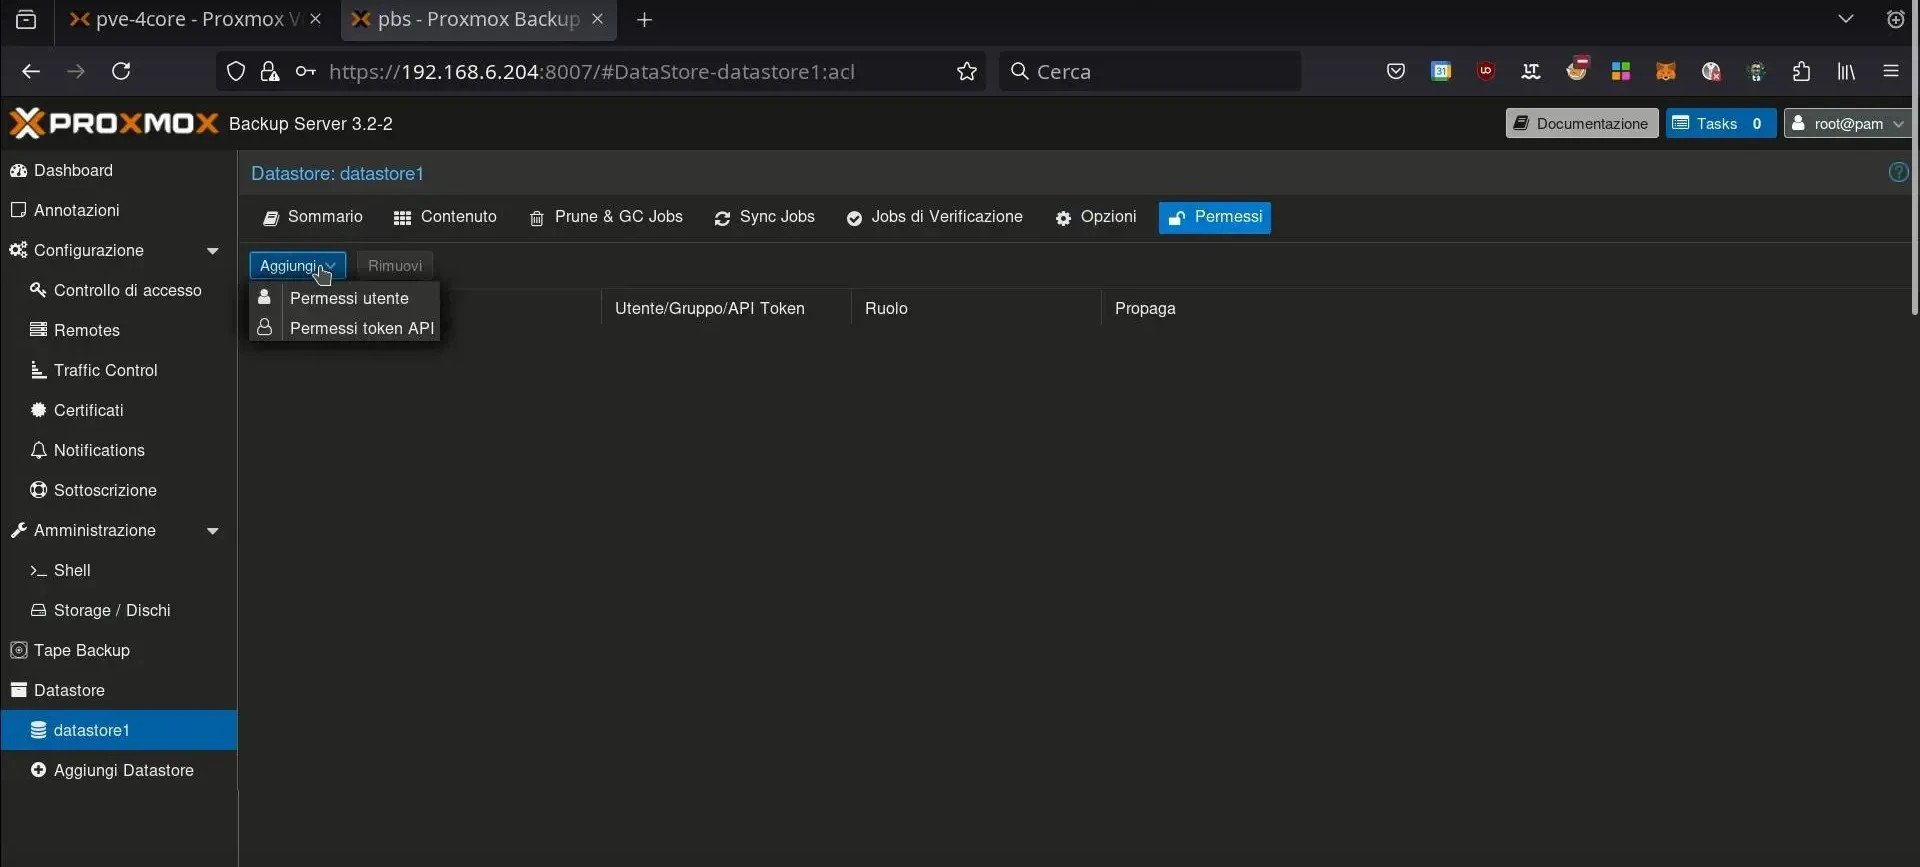
Let’s assign “DatastoreAdmin” permissions to the user created earlier, for example backup@pbs.

Connecting the Proxmox Backup Server to Proxmox VE
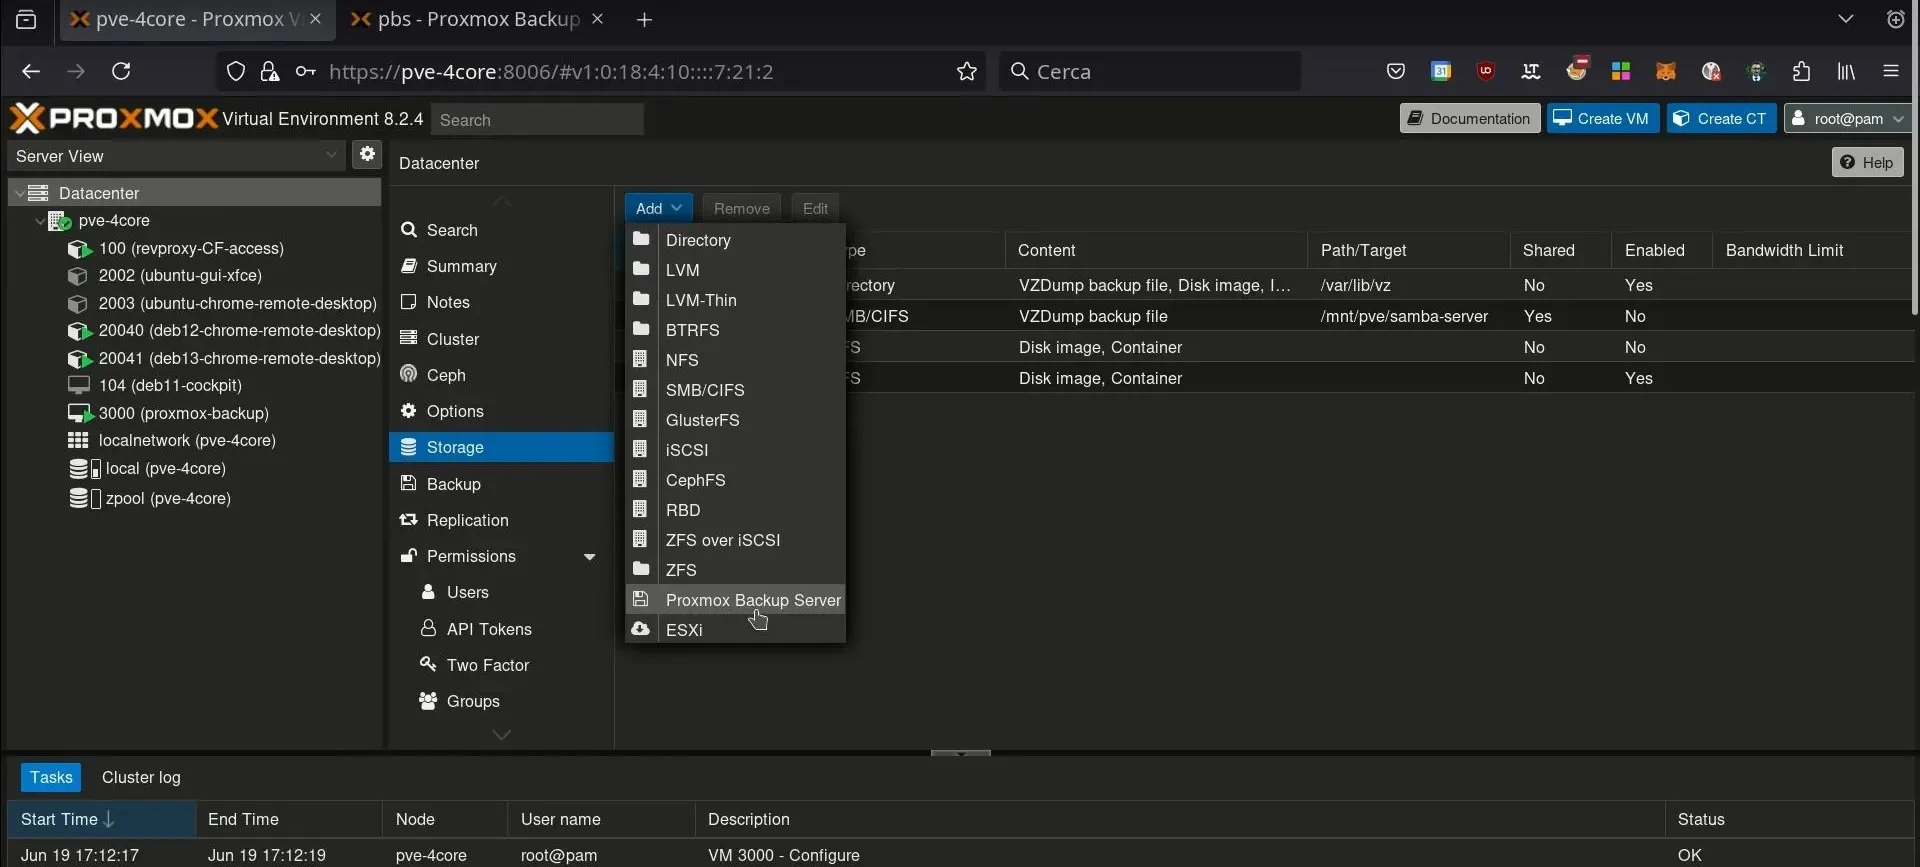
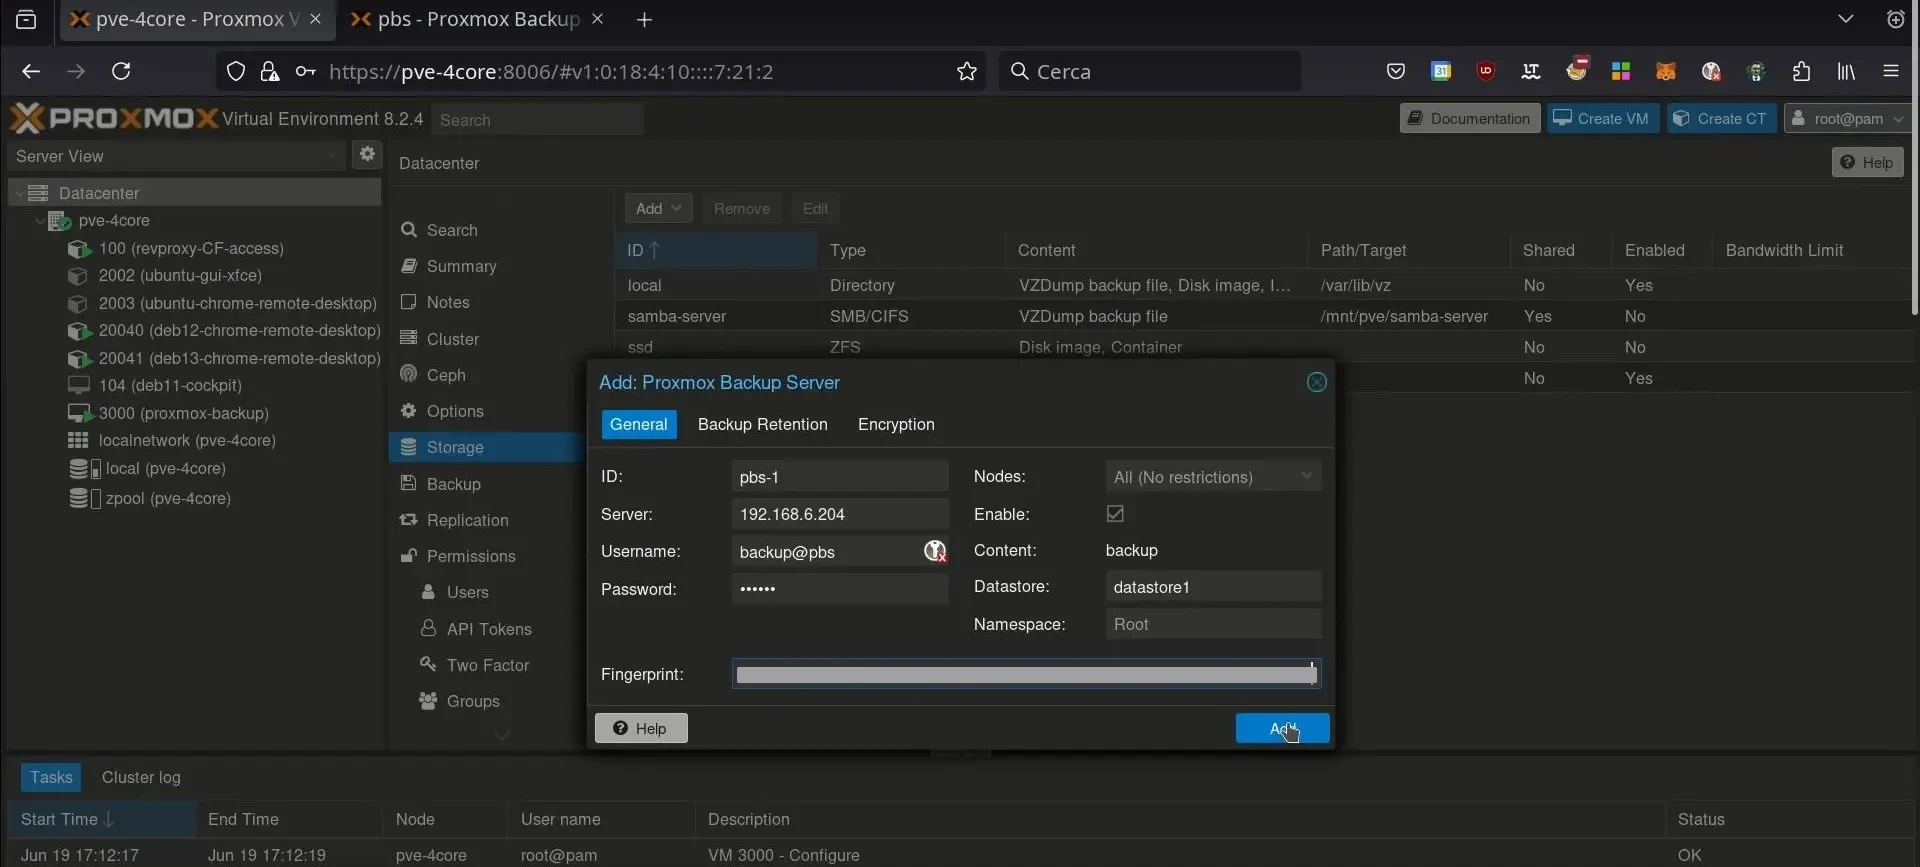
Let’s connect our Proxmox Backup Server datastore to Proxmox Virtual Environment (PVE). In “Datacenter / Storage,” add a new storage device named “Proxmox Backup Server.”
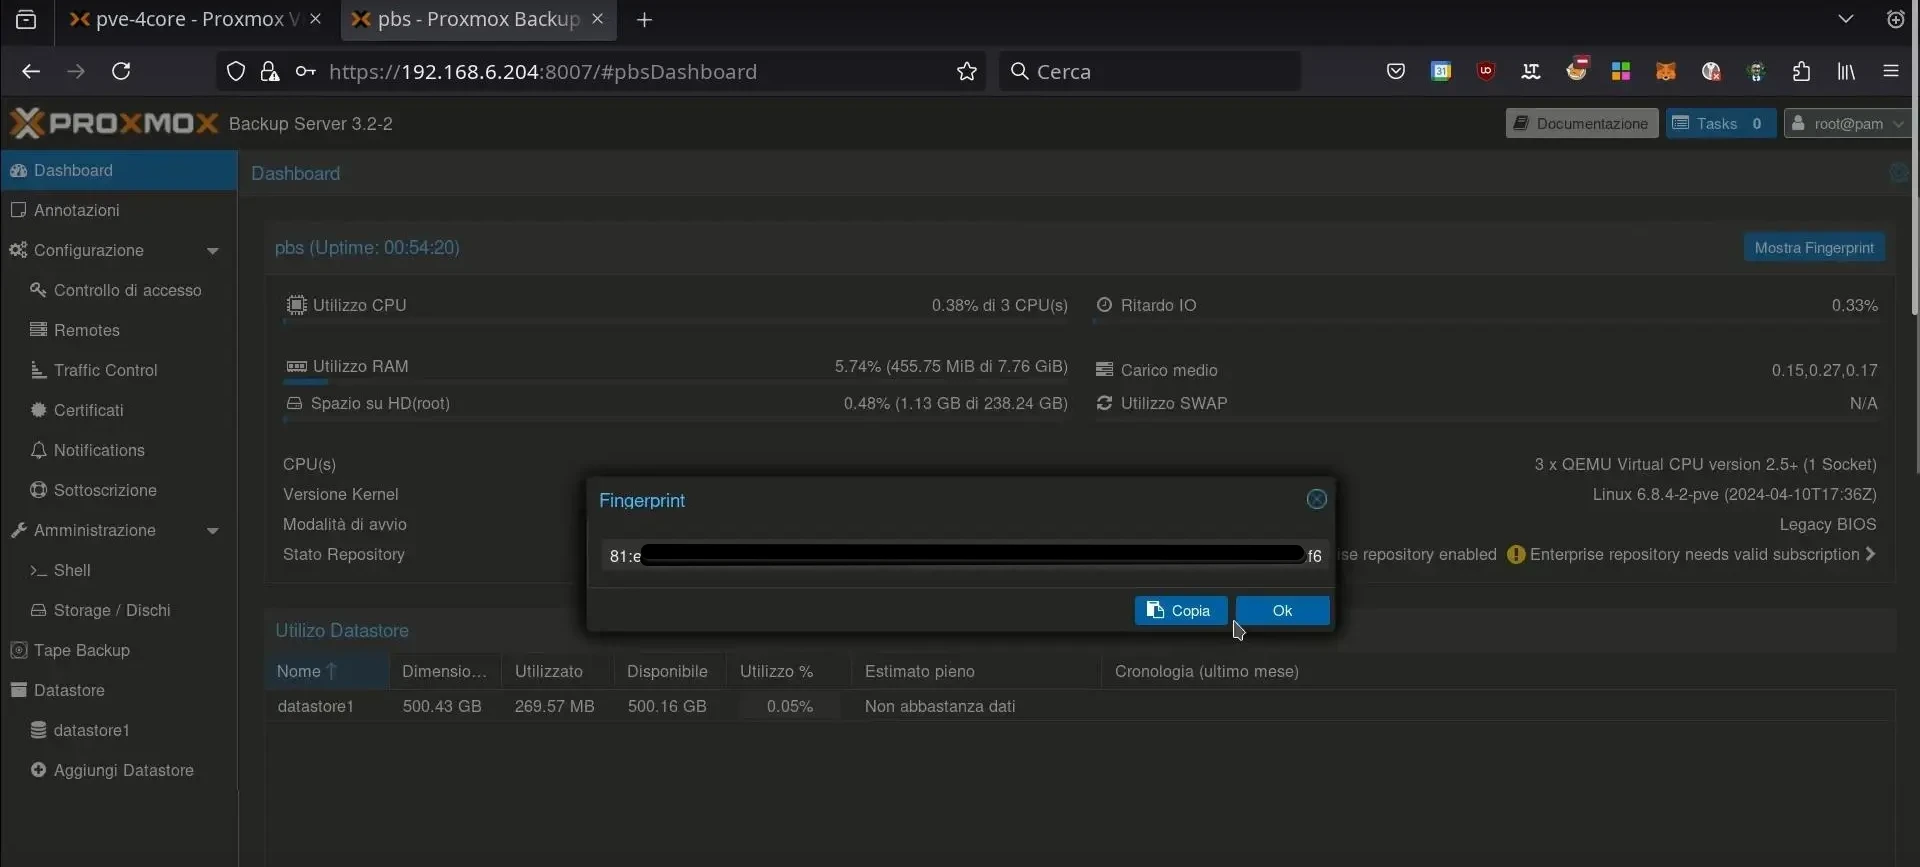
At this point, we’ll need the Proxmox Backup Server fingerprint, which can be found on the PBS under “Dashboard”; copy it from there
Back in PVE, enter the “ID” (the name that will be displayed for the storage in the Virtual Environment), the backup IP address, the username of the backup account you created, the password, the datastore, and the fingerprint
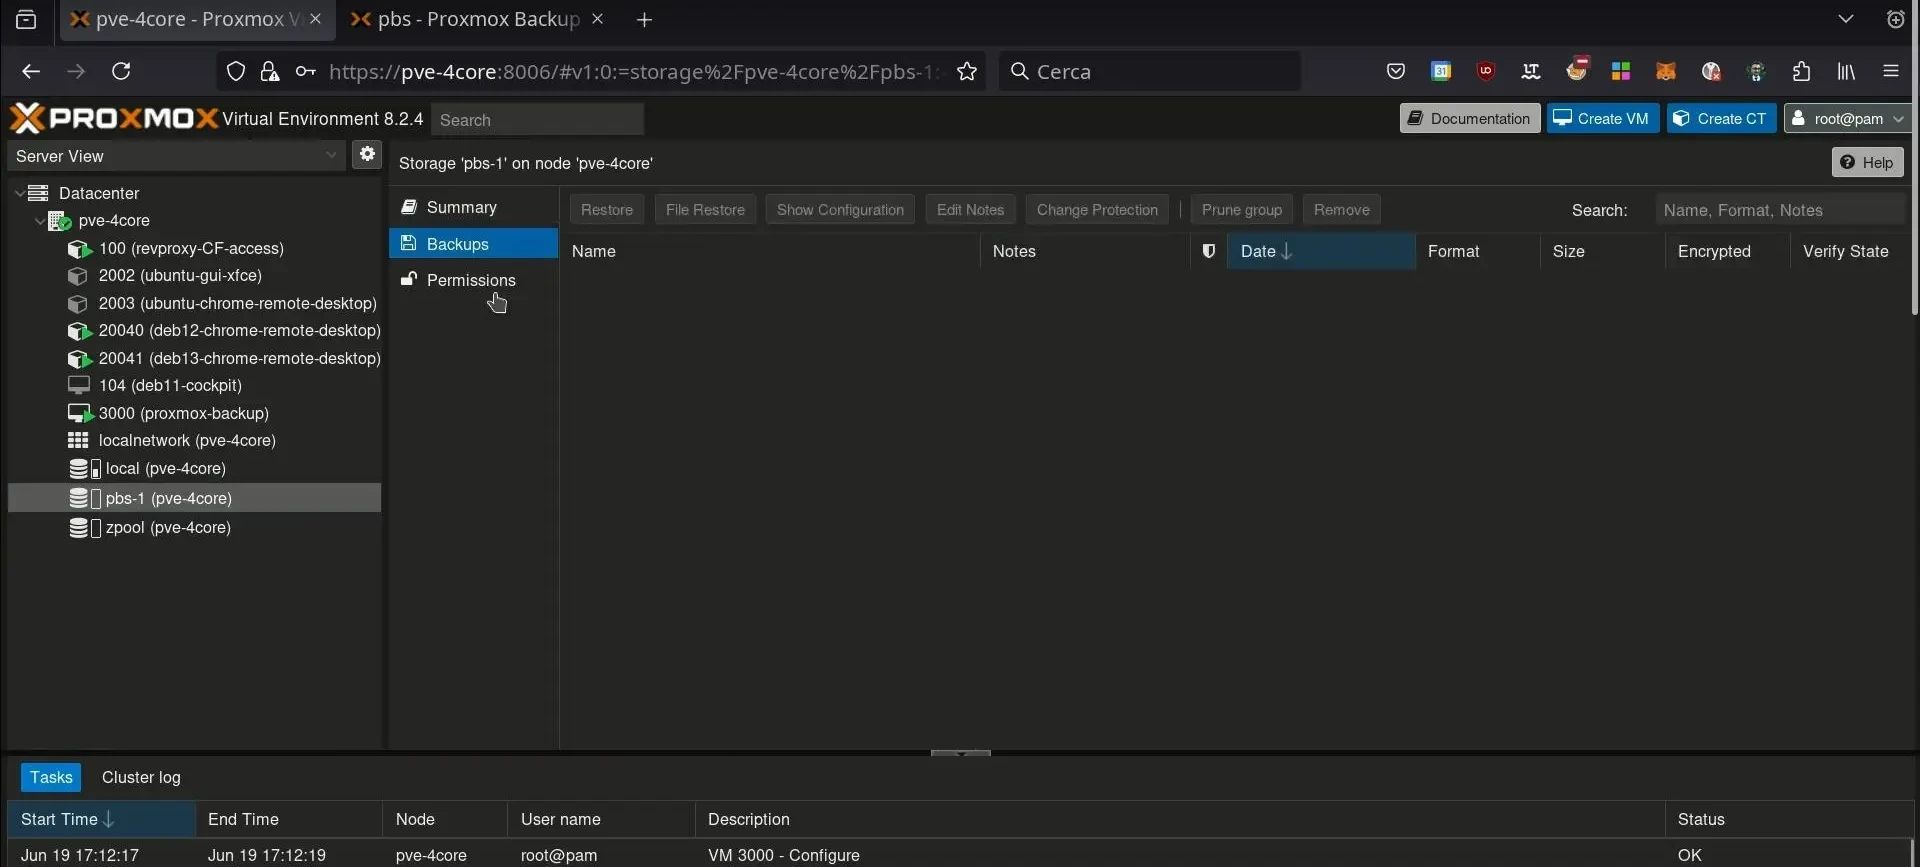
Now our Proxmox VE will show the Proxmox Backup storage as connected and ready.
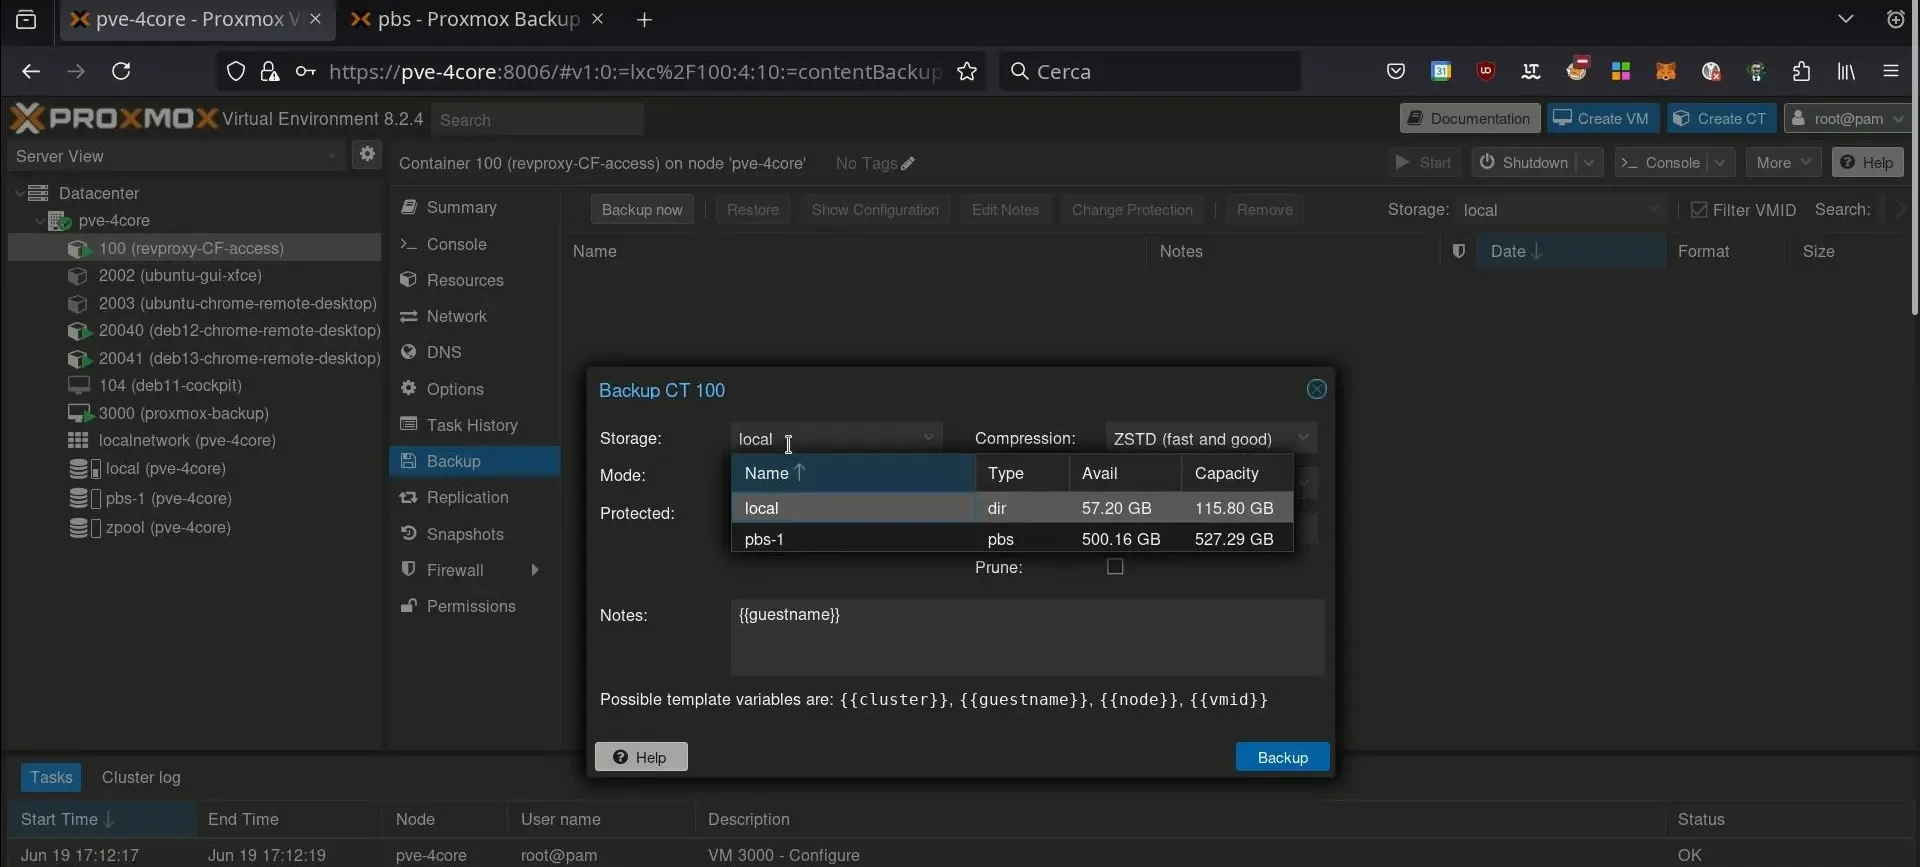
Creating the First Backup
With the Proxmox Backup Server storage connected, select a virtual machine or container and start the backup by choosing the “pbs” storage type.
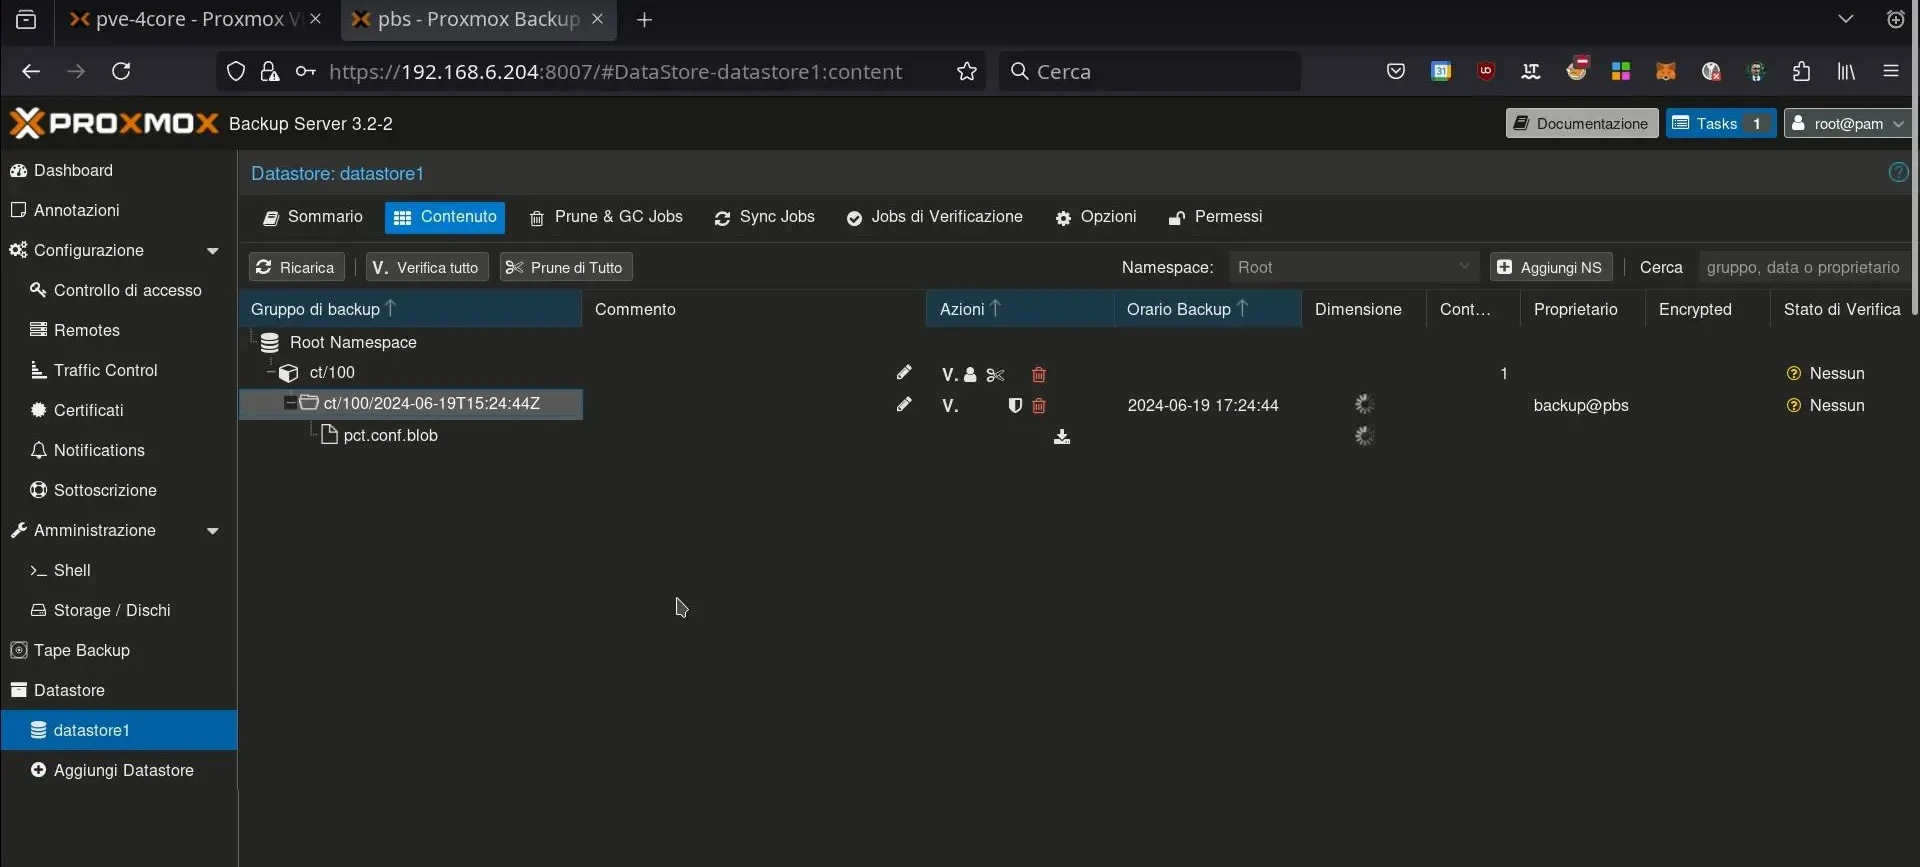
In the Backup Server’s web console, you can monitor the backup’s progress under “Datastore / datastore_name.”
You’ve configured the Proxmox Backup Server. But managing a Proxmox architecture is a proactive effort: hardening, cluster management, high availability, networking, and 24/7 monitoring of the entire Proxmox VE environment.
Outsource the complexity. Trust our experts to ensure a secure, high-performance, and always-available infrastructure.