Windows 10 fixed IP in just 9 steps
The introduction of Windows 10 much encouraged by Microsoft, the operating system has taken on a new look and feel, and some components have been moved around and ways of performing even simple tasks such as setting a static IP address
If this is not your operating system, check out our guide for configuring the fixed IP address on Windows 7
Configuring the static IP address
The static IP is used for us to allow incoming connections to our computer, from the outside
It is also possible to set it on the modem/router but this process changes depending on the manufacturer
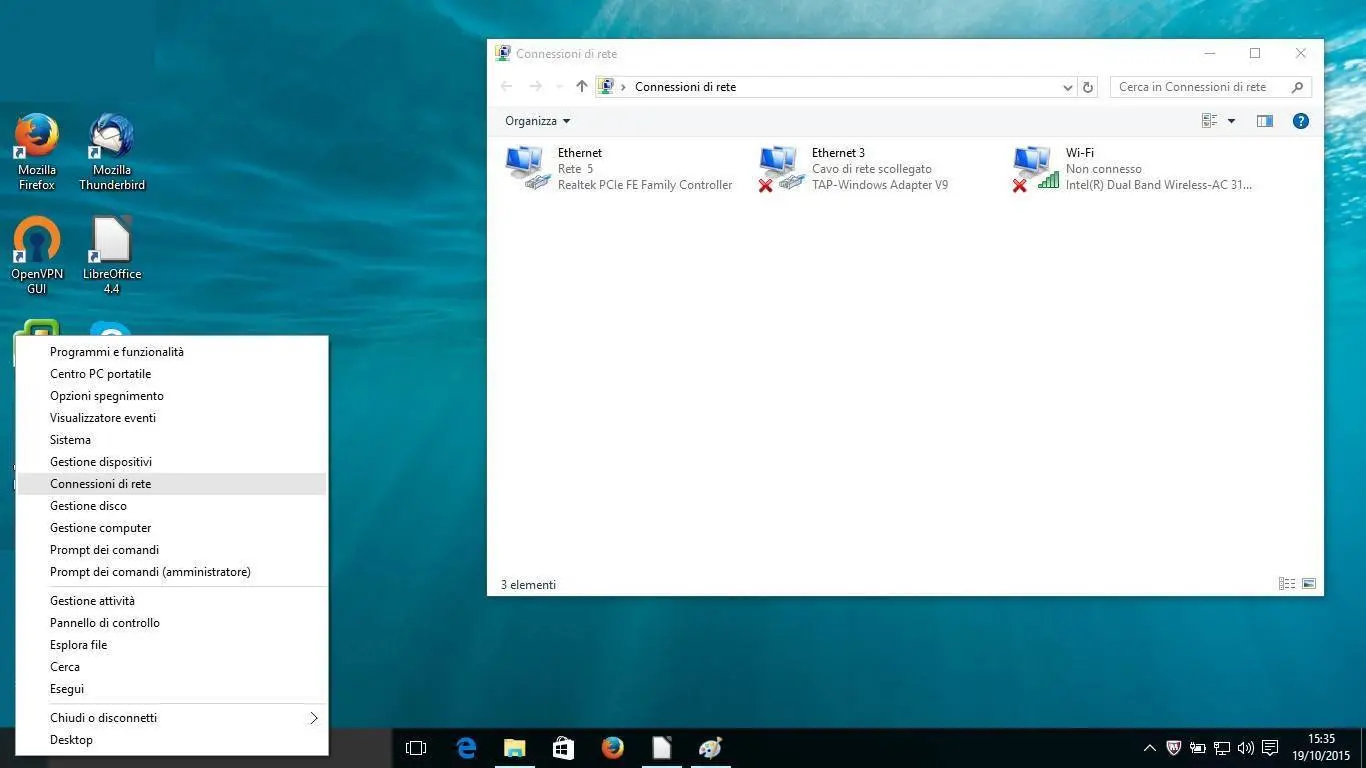
- Right button on the start icon at the bottom left
- Select network connections
- Key right on the desired connection (in the example via Ethernet cable)
- Select and click "Properties"
- Select "Internet protocol version 4 (TCP/IPv4)"
- Properties
- Enter the desired address, gateway and DNS
- Select validate on exit
- Click OK
Through these simple steps we have set the static IP address, clearly the addresses that we enter must be consistent with those of our network
In the pictures you can see in detail the windows that appear to us during the procedure and where to click
At this point it is advisable to test, such as opening the window of cmd (via the Windows button, run) and test a ping to Google (ping google.it) or to another website, if it responds (0 packets lost) our configuration was successful
Share is Care!
I hope this guide was useful to you, if it helped you, you liked it, it was a good remedy for insomnia, or your cat enjoyed using the press as a litter box,share us on social, you can also leave a comment or send us a message